
Another feature of this drill is a feed screw that
can be used with a special type of drill stand called an
"old man." This drill stand is shown in view B of figure
5-33. To drill a hole using the "old man," first place
the twist drill in the socket. Adjust the feed screw in
the machine to its lowest position and place the point
of the feed screw in one of the indentations in the arm.
Drill the hole to the required depth. Watch the drill;
when it begins to come through. decrease the speed.
Hold the drill motor up by hand so that it will not drop
onto the work.
The pneumatic grinder, shown in figure 5-34,
operates on the same basic principle as the pneumatic
drill. It can be equipped with either a grinding wheel
or a wire bristle wheel. After attaching the appropriate
wheel, perform the preliminary steps required to
connect the pneumatic grinder. Always run this
machine so that the grinding surface of the wheel is
square with the surface of the material being ground.
Do not grind soft nonferrous metals, such as aluminum
or brass, on a wheel that is designed for carbon and
alloy steels. A silicon carbide abrasive wheel is
suitable for grinding soft nonferrous metals,
nonmetallic materials, and cemented carbides. Make
sure that the rpm rating on the wheel is greater than
that of the grinder. If the rpm rating of the grinder is
greater than the wheel, the wheel stands a good chance
of shattering and causing personnel injury from flying
particles.
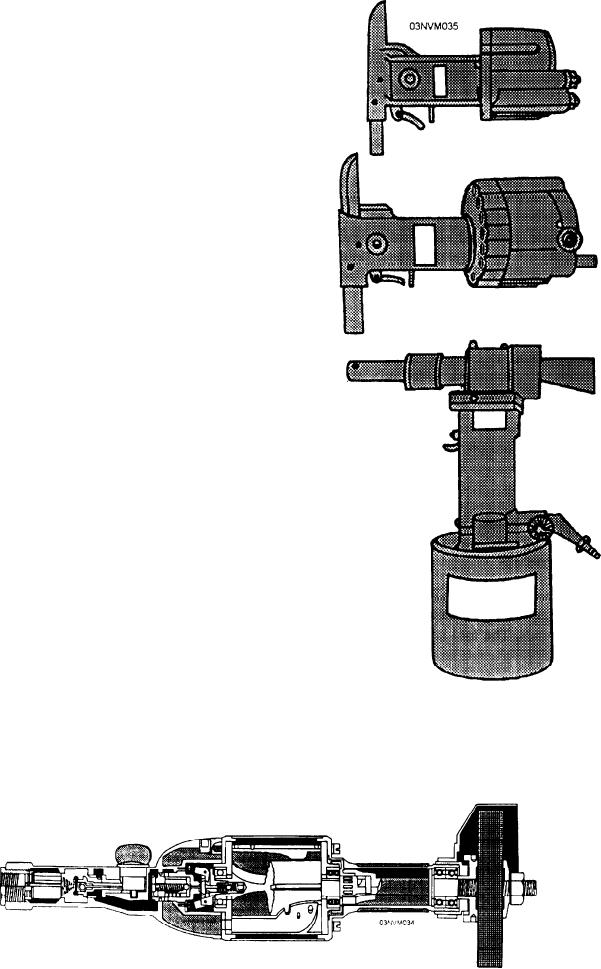
In recent years, we have started using several new
types of pneumatic tools that are used for the setting
of rivets and fasteners. As a result, rivets and fasteners
can now be set easier and faster. The tools shown in
figure 5-35 are relatively easy to operate, and you need
to remember only the few simple precautions
described in the following paragraphs.
Pneumatic tools must have thorough lubrication.
The moving parts of a pneumatic tool are very closely
Figure 5-35.--Pneumatic rivet setting tools.
Figure 5-34.--Sectional view of a pneumatic grinder.
5-20