
TM 55-2815-574-24
0150
REMOVAL - Continued
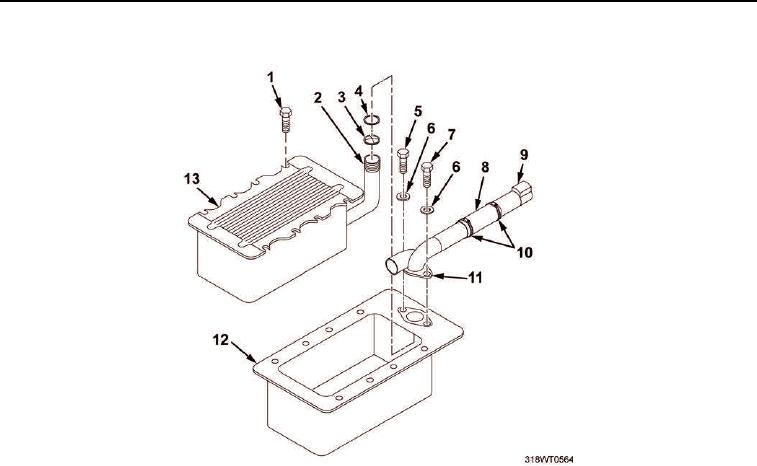
Figure 3. Engine Aftercooler.
CAUTION
Be careful not to damage cooler fins when lifting aftercooler from cylinder block. Failure to
comply may result in damage to equipment.
8.
Lift aftercooler (Figure 3, Item 13) from cylinder block opening (Figure 3, Item 12).
9.
Remove and discard O-ring (Figure 3, Item 4) from water inlet/outlet (Figure 3, Item 2).
10.
Remove and discard plate and seal assembly (Figure 3, Item 3) from water inlet/outlet (Figure 3, Item 2).
END OF TASK
INSTALLATION
1.
Install new plate and seal assembly (Figure 3, Item 3) on water inlet/outlet (Figure 3, Item 2).
2.
Install new O-ring (Figure 3, Item 4) on water inlet/outlet (Figure 3, Item 2).
3.
Place aftercooler (Figure 3, Item 13), water inlet/outlet (Figure 3, Item 2) end first, into cylinder block
(Figure 3, Item 12) opening.
4.
Lower opposite end into cylinder block (Figure 3, Item 12).
5.
Ensure water inlet/outlet (Figure 3, Item 2) is mated into cylinder block (Figure 3, Item 12).
6.
Install eight new attaching bolts (Figure 3, Item 1) with eight nylon locking patches loosely onto aftercooler
(Figure 3, Item 13).
7.
Align water inlet/outlet fitting (Figure 3, Item 11) to thermostat housing (Figure 3, Item 9) with hose
(Figure 3, Item 8) and slide hose with clamps (Figure 3, Item 10) onto water inlet/outlet fitting.

