
more resistance to the abrasive. Instead, they tear
method of sanding is for surfaces for which a
the abrasive from the paper. This loose material, in
sanding block will not work. Avoid sanding too long
turn, wears the softer portions of the wood. This
in one spot. This could change the dimensions of a
produces a washboard surface that is not acceptable
job.
for a pattern. When the same woods are sanded
across the grain, the abrasive material rapidly cuts
After you have finished sanding with a folded
tiny chips out of the hard fiber walls. The entire
sandpaper, finish sanding by tearing off a narrow
abrasive face of the sandpaper dulls evenly. It
strip of sandpaper. Use it shoeshine fashion. Use
cannot remove the soft grain portion any faster than
a fine grade of sandpaper when you are finishing
the reduction of the hard fibers will permit.
small jobs. Use coarser grades on larger work.
For sanding flat surfaces, you should select a
The principal purpose of sanding a finished or
sheet of sandpaper that is just coarse enough to
lacquered surface is to remove any roughness that
dress the surface free of tool marks without cutting
may be present without removing the finish. The
the surface too rapidly. Then, tear or cut a sheet of
pressure exerted on the sandpaper should never be
sandpaper into four equal parts since it is too large
greater than that necessary to get satisfactory
for the average-size job.
results. Also, use as fine a grade of sandpaper as
the job will permit.
Make a sandpaper block and fold one of the
pieces of sandpaper around it. Sand the surface by
Look at the finished surface to see if it is fully
moving the block back and forth across the grain
dry before trying to sand it. Select a sheet of
with long strokes. Move along the surface from one
sandpaper of proper grade for the job to be done.
end of the material to the other. Do not sand in
Sand the surface very lightly at first. Use strokes
one spot. Try to remove an equal amount from all
that are as long as possible. Do no more sanding
parts of the surface during each sanding motion.
than is necessary to produce a smooth surface.
Brush the surface free of wood dust and loose
Also, examine the sandpaper often to see if any part
abrasives. Examine the surface for tool marks. If
has become gummed with finish material. If it has,
they are not all removed, repeat these sanding
do not use that part of the sandpaper any longer.
operations until you get the desired results.
It will scratch the surface of the job.
Complete sanding of the surface with a fine grade of
sandpaper, then brush the surface clean.
LATHE SANDING
When sanding straight narrow edges, sand with
Sanding work in a lathe should be done very
the grain of the wood. Most people use a rocking
carefully because the dimensions of the job may
motion with a sanding block when cross-grained
alter. Carefully turn the job to a smooth finish so
sanding on narrow edges. The rocking motion
only minor sanding is necessary to finish the surface.
produces a rounded surface.
Use a fine grade of sandpaper (120 or 150) on the
average-size job. Always remove the tool rest from
W h e n sanding concave surfaces, use a
the lathe before sanding a job.
round-faced block. Do as much cross-grained
sanding as you can. Start each sanding stroke at the
top edge of the concave surface and push toward
the bottom. Do not sand on the back stroke. You
may pass over the edge and knock the corner over.
Clean the surface often during sanding and look for
tool marks. Finish the surface with a fine grade of
sandpaper.
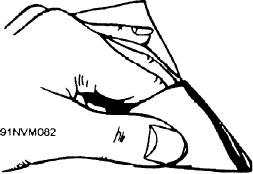
I n sanding irregular surfaces, the usual
procedure is to tear the sandpaper sheet into four
equal parts. Fold each part to get three separate
surfaces. As one surface of the paper becomes dull,
Figure 3-54.--Holding folded sandpaper.
turn the paper over until the entire piece has been
used. Hold the paper as shown in figure 3-54. This
3-39