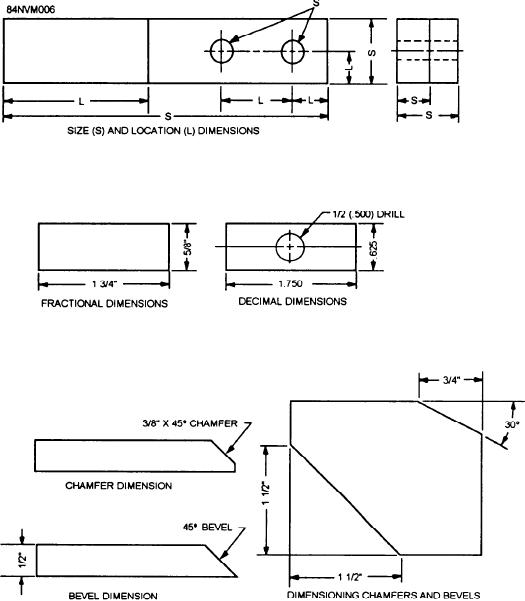
Figure 13-6.--Various dimensions that are shown on blueprints.
Remember: NEVER MEASURE A DRAWING.
Views
USE DIMENSIONS. Why? Because the print may
There are numerous ways to project and draw an
have been reduced in size from the original drawing, or
object, each with its own special characteristics and
you might not take the scale of the drawing into
consideration. Then too, paper stretches and shrinks as
functions. On drawings and prints, a view is technically
humidity changes, thus introducing perhaps the greatest
known as a projection. Orthographic and sectional
source of error in actually taking a measurement by
views are the most commonly used, and will be
laying a rule on the print itself. Play it safe and read the
discussed in the following paragraphs. This section will
dimensions on the drawing; they always remain the
also discuss phantom, exploded, and development
same.
views.
ORTHOGRAPHIC VIEWS.--As an HT, you
ADDITIONAL GUIDES
will be most concerned with a three-view orthographic
projection, which shows all sides of an object. The
Blueprints and drawings are made so that objects to
sides, top, and bottom of the object are drawn in detail,
be fabricated or repaired can easily be visualized by the
but appear to be transparent, as shown in figure 13-7.
reader. Views, detailed drawings, and assembly prints
are used as guides to assist you in the fabrication and
Any features of an object that are hidden from view on
repair of structures and systems.
any of the three projections are shown using hidden
13-7

