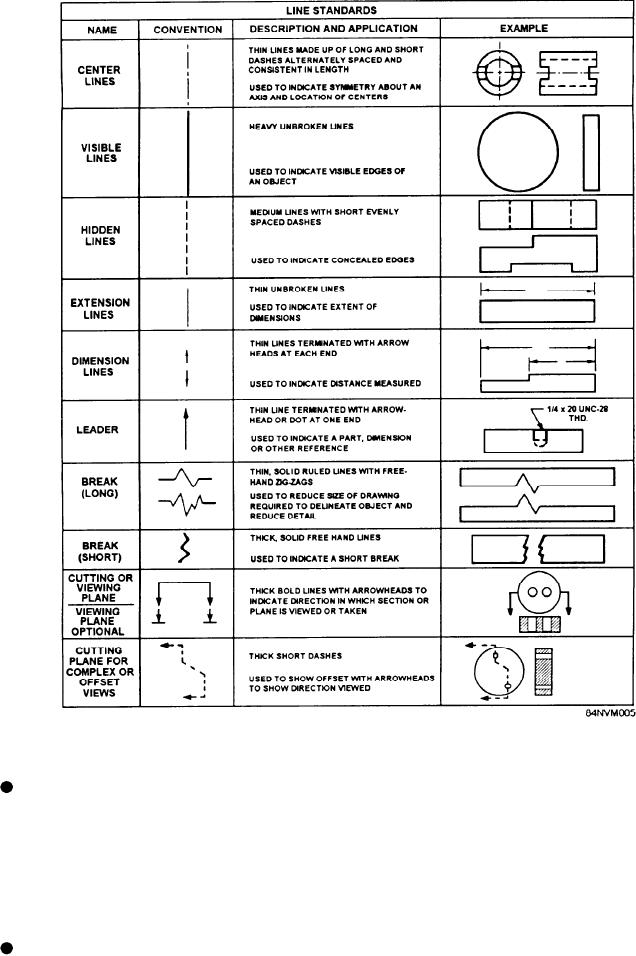
Figure 13-5.--Line standards.
SCALE
Drilled hole dimensions are shown on a print
Most blueprints are drawn to scale for the simple fact
by a leader and a note. The leader lists drill
that it would be impossible to draw a full-size
size, the number of holes to be drilled, and the
representation of an item on paper due to the size of many
depth of the hole to be drilled. If depth is not
items. Large objects are reduced and smaller items
given, the hole is drilled completely through
enlarged to fit standard sized paper. The scale of a
the object.
blueprint is indicated in the title block. It indicates the size
of the drawing as compared to the actual size of the object.
Tolerance dimensions represent the amount by
The scale may be shown as 1" = 2", 1"= 12", "= l', and
which a dimension can vary and remain within
so on. It may also be indicated as full size, one-half size,
specification. Tolerances are indicated by a
one-fourth size, and so on.
plus (+) or a minus (-) symbol.
13-6

