
2. Open the flaring tool so that you can insert the
tubing in the opening of the correct size. Most hand
flaring tools have openings of several different
diameters to accommodate different sizes of tubing.
3. Insert the end of the tubing so that it extends a
short distance above the surface of the flaring block.
The distance that the tubing must extend above the
block is different for different diameters of tubing.
4. When the tubing is in the proper hole and
extends the required distance above the surface of the
flaring block, close the flaring tool. Now tighten the
block by turning the wing nut.
5. Place the yoke over the end of the tubing and
tighten the handle of the yoke. This forces the flaring
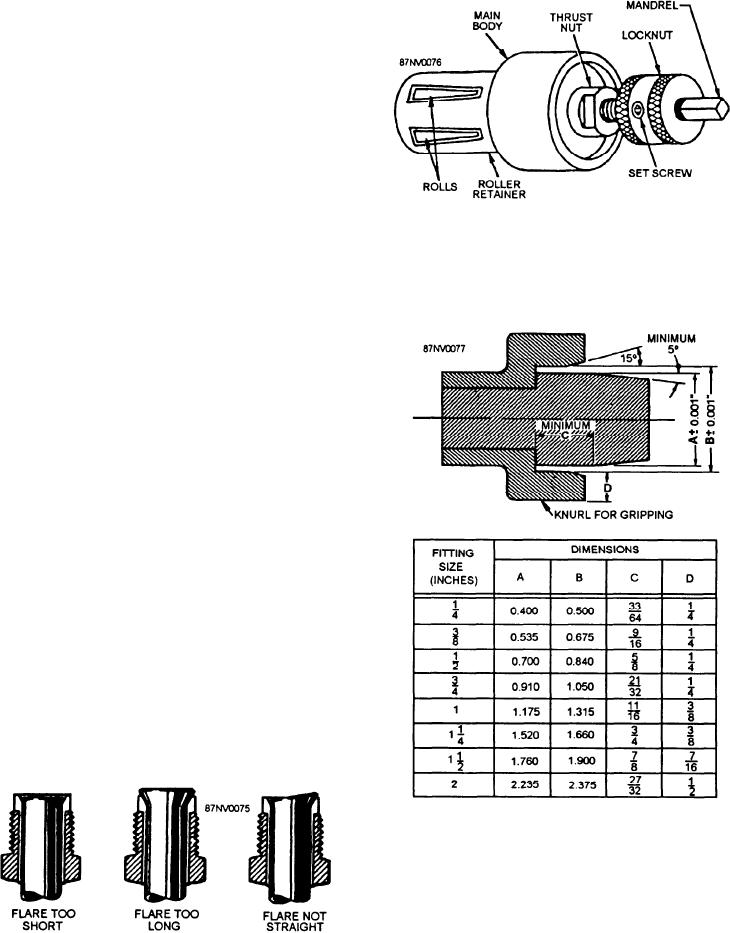
Figure 16-37.--Pipe sizing machine.
pin into the end of the tubing.
The completed flare must be square and true at the
end and it must be the right length. Figure 16-36 shows
three mistakes that are commonly made in flaring
tubing.
SIZING TUBING AND PIPE
Tests have shown that if optimum strength is to be
achieved between pipes and fittings, correct clearances
must be obtained. This is particularly important when
preparing silver-brazed joints. Sometimes the ends
become enlarged when the pipe or tubing is bent. Other
operations may cause the ends to become considerably
smaller. In either case, the dimensions must be corrected
to obtain proper fit between the tubing and the fitting.
Pipe expanding tools (figs. 16-37 and 16-38) are
designed to correct out-of-roundness and expand pipe
ends to correct clearances. These tools are
manufactured in sizes to fit most standard size pipes.
Pipe Sizing Machine
Pipe sizing machines (expanders) use a series of
hardened rollers that are forced against the pipe wall by
Figure 16-38.--Shaping and sizing tool.
a mandrel and thrust nut (fig. 16-37). By rotating the
mandrel, the rollers revolve around the inside of the pipe
to bring the pipe into roundness. These types of
Figure 16-36.--Examples of incorrect flares.
machines may be used on all types of piping material.
16-31