
TM 55-2815-574-24
0137
REMOVAL - Continued
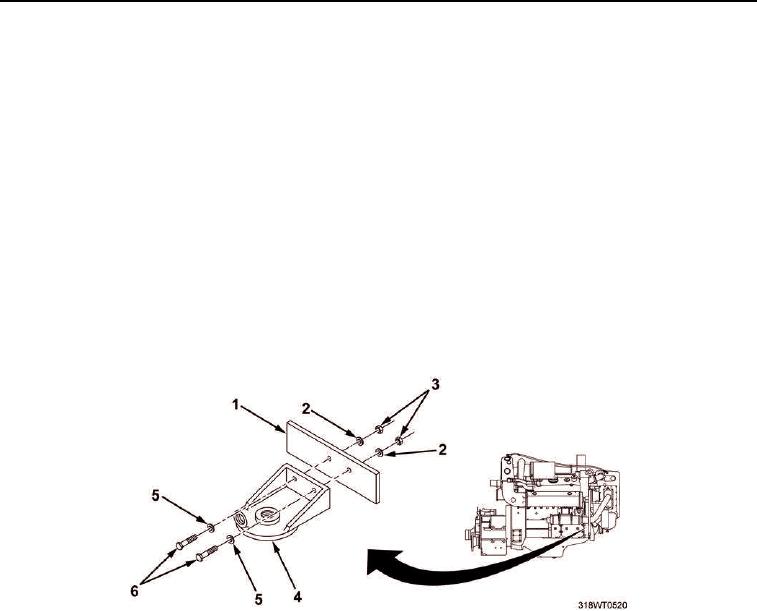
9.
Remove two hex nuts (Figure 2, Item 3) and lockwashers (Figure 2, Item 2) from capscrews
(Figure 2, Item 6).
10.
Remove two capscrews (Figure 2, Item 6) and flat washers (Figure 2, Item 5) from filter cover
(Figure 2, Item 4).
11.
Remove filter cover (Figure 2, Item 4) from bracket (Figure 2, Item 1). Discard filter cover.
12.
Remove drain pan and dispose of contents in accordance with local procedure.
END OF TASK
INSTALLATION
1.
Position new filter cover (Figure 2, Item 4) on bracket (Figure 2, Item 1).
2.
Install two capscrews (Figure 2, Item 6) and flat washers (Figure 2, Item 5) on filter cover (Figure 2, Item 4).
3.
Install two hex nuts (Figure 2, Item 3) and lockwashers (Figure 2, Item 2) on capscrews (Figure 2, Item 6).
Figure 2. Filter Head Cover.