line left by the 45-degree miter cut. The ends of the
abutting members will then match the face of the
other member as shown in view D.
Mortise-and-Tenon Joints
The mortise-and-tenon joint is mostly used in
f u r n i t u r e and cabinet work. In the blind
mortise-and-tenon joint (refer to fig. 3-21), the
tenon does not penetrate all the way through the
mortised member. When the tenon penetrates all
the way through, it is a through mortise-and-tenon
joint. Besides the ordinary stub joint (fig. 3-37, view
A), there are haunched joints (view B) and
table-haunched joints (view C). Haunching and
table-haunching increase the strength and rigidity of
the joint.
MORTISE-AND-TENON LAYOUT.--You can
lay out an ordinary stub mortise-and-tenon joint
using the following steps:
1. Mark the faces of the members plainly.
2. Lay off the desired length of the tenon.
3. Square the shoulder line all the way around.
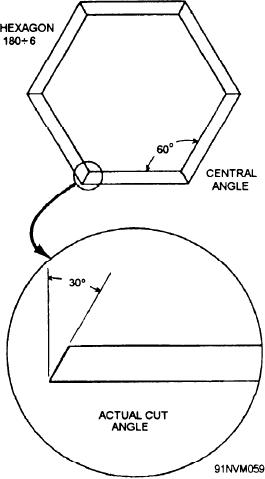
Figure 3-33.--Mitering angles.
4. Then, lay off the total width of the tenon
member on the mortise member, as shown in figure
joint. (See fig. 3-34 for a simple jig to use when
3-38.
making the kerf cut.) Saw about halfway through
from the outer to the inner corner. Apply glue to
5. Determine the thickness of the tenon. It is
both sides of the slip feather, and push the slip
usually between one-third and one-half the thickness
feather into the kerf (fig. 3-35). Clamp it tight and
of the mortise member.
allow the glue to dry. After it has dried, remove the
clamp and chisel off the protruding portion of the
6. Use a marking gauge to mark two lines (fig.
slip feather.
3-38). If the faces of the members are to be flush,
use the same gauge setting to score a double line on
Coping Joints
the mortise member. Remember to gauge from the
face of the member. If the face of the tenon
Inside corner joints between molding trim
member is to be set back from the face of the
members are usually made by placing the end of
mortise member, you should increase the mortising
one member against the face of the other. Figure
gauge setting by the amount of the setback.
3-36 shows the method of shaping the end of the
abutting member to fit the face of the other
7. Last, lay off from the end of the mortise
members. First, saw the end of the abutting
member and from the matching edge of the tenon
member square. Do this as you would an ordinary
member. Lay off by the amount of end stock that
butt joint between ordinary flat-faced members.
is to remain above the mortise.
Then, miter the end to 45, as shown by views A
and B of figure 3-36. Set the coping saw at the top
NOTE: You wouldn't need this last step of the
of the line of the miter cut. Hold the saw at 90 to
layout for a slip-tenon joint, like the one shown in
the lengthwise axis of the piece. Saw off the
figure 3-21.
segment as shown in view C. Closely follow the face
3-25


