an edge of the metal upon which you are working as the
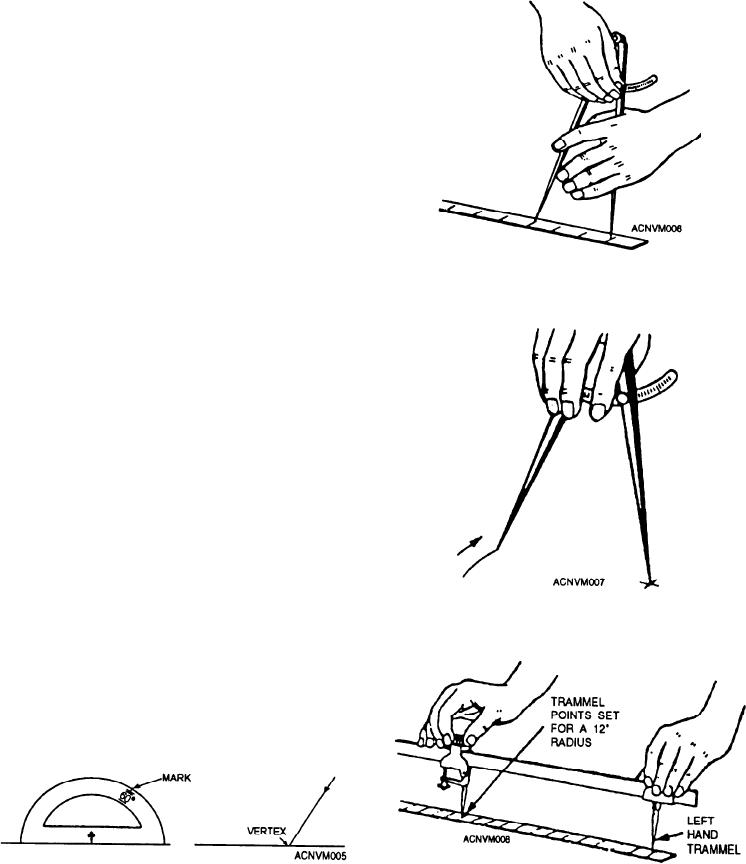
When you need to scribe a circle with a radius larger
than your dividers, you will have to use TRAMMEL
base line. One edge of the head of the combination
POINTS. The points are adjusted as shown in figure
square is 90 degrees and the other edge is 45 degrees.
12-8. Set the left-hand point on one mark, sliding the
Lay either edge of the head on the edge of the metal to
right-hand point to the desired distance, and tighten the
make either a 45- or 90-degree angle to the edge of the
metal.
Combination squares are delicate instruments and
will be of little value if they receive rough handling.
Stow your tools properly when you are not using them.
Keep them clean and in tiptop shape, and you will be
able to construct 90-degree angles, 45-degree angles,
and parallel lines without error.
Use a protractor to construct lines for angles other
than 45 or 90 degrees. Mark the vertex of the angle on
the base line with a prick punch. (See fig. 12-5.) Set the
vertex of the protractor on the mark, and then scribe a
V at the desired angle (in this illustration, 70). Scribe
the line between the vertex and the point located by the
V and you have constructed an angle of 70.
Figure 12-6.--Setting the dividers.
When you mark a point with the PRICK PUNCH,
use very light taps with a small ballpeen hammer. The
smaller the mark you make (so long as you can see it),
the more useful and accurate that mark becomes.
Use DIVIDERS to scribe arcs and circles, to
transfer measurements from a scale to the layout, and to
transfer measurements from one part of the layout to
another. Careful setting of the dividers is of extreme
importance. When you transfer a measurement from a
scale to the work, set one point of the dividers on the
scale mark and accurately adjust the other leg to the
desired length, as illustrated in figure 12-6.
To scribe a circle or an arc, grasp the dividers
between the fingers and the thumb, as shown in figure
Figure 12-7.--Scribing an arc or circle with dividers.
12-7. Place the point of one leg on the spot that will be
the center of the circle or arc. Exert just enough pressure
to hold the point at the center, slightly inclining the
dividers in the direction in which they are to be rotated.
Then rotate your dividers with both legs touching your
work to make your circle or arc.
Figure 12-5.--Constructing an angle with the protractor.
Figure 12-8.--Setting trammel points.
12-3

