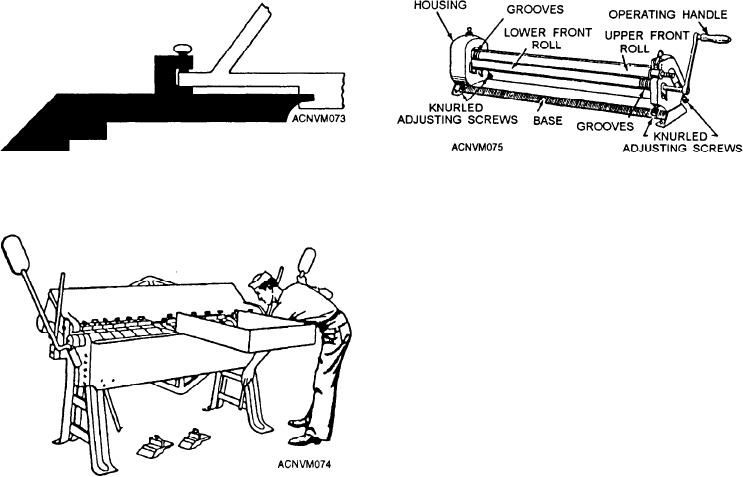
Figure 12-73.--Method of securing finger brake.
Figure 12-75.--Slip-roll forming machine.
accurate bend. Rolling machines are available in
various sizes and capacities. Some are hand operated,
as is the one shown in figure 12-75. Others are power
operated.
The machine shown in figure 12-75 has two rollers
in the front and one roller at the rear. Adjusting screws
on each end of the machine control the height and angle
of the rear roll and control the distance between the front
rolls. By varying the adjustments, you can use the
machine to form cylinders, cones, and other curved
shapes. The front rolls grip the metal and pull it into the
machine. Therefore, the adjustment of distance between
the two front rolls is made on the basis of the thickness
of the sheet.
Figure 12-74.--Finger brake being used to form box (note
fingers removed).
To form a cylinder in the slip roll (fig. 12-76),
follow this procedure:
make the last bend. In the linger brake, you remove the
1. Adjust the front rolls so that they will grip the
fingers that are in the way and use only those fingers
sheet properly.
that arc required to make the bend (fig. 12-74). All
fingers that are not removed for any operation must bc
2. Adjust the rear roll to a height that is LESS
securely seated and fastened before the brake is used.
THAN enough to form the desired radius of the
cylinder.
To maintain brakes in good condition, keep the
working parts well oiled and be sure the jaws are free
3. Cheek to bc sure all three rolls are parallel.
of rust and dirt. When operating the brakes, take care to
4. Start the sheet into the space between the two
avoid doing anything that would spring the parts, force
front rolls. As soon as the front rolls have gripped the
them out of alignment, or otherwise damage them.
sheet, raise the free end of the sheet slightly.
Never use brakes for bending metal that is beyond their
capacity such as thickness, shape, or type. Always bend
5. Pass the entire sheet through the rolls. This will
short or small pieces in the center of the brake. Never
form part of the curve required for the cylinder.
try to bend rod, wire, strap iron, or spring steel sheets in
6. Set the rear roll higher to form a shorter radius.
a brake. Never hammer work while it is in a brake. If it
is necessary to hammer the work, remove the work from
7. Rotate the sheet and pass it through the rolls
the brake first.
again, feeding the opposite edge in first this time.
8. Continue rotating the sheet around and passing
Slip-Roll Forming Machines
it through the rolls, each time adjusting the rear roll for
a new radius, until a cylindrical shape has been formed.
Sheet metal can be formed into curved shapes over
a pipe or a mandrel, but the slip-roll forming machine
9. Remove the cylinder from the slip roll. The top
(fig. 12-75) is much easier to use and produces a more
front roll has a device allowing you to release one end
12-33

