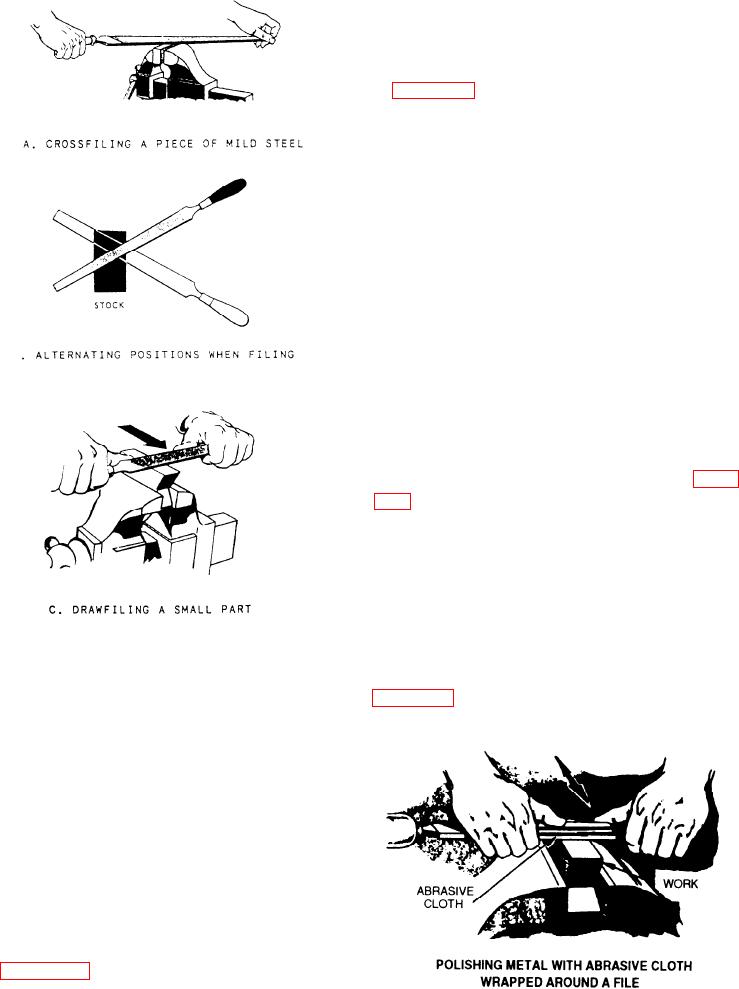
yourself as you file with slow, full-length, steady
strokes. The file cuts as you push it. Ease up on the
return stroke to keep from dulling the teeth. View B
of figure 2-35 shows the alternate positions of the file
when an exceptionally flat surface is required. Using
either position first, file across the entire length of the
stock. Then, using the other position, file across the
entire length of the stock again. Because the teeth of
the file pass over the surface of the stock from two
directions, the high spots and low spots will be visible
after filing in both positions. Continue filing first in
one direction and then the other until the surface has
been filed flat. Test the flatness with a straightedge,
or where precision is required, with Prussian blue and
a surface plate.
DRAWFILING
Drawfiling produces a finer surface finish than
crossfiling. Small parts, as shown in view C of figure
2-35, are best held in a vise. Hold the file as shown in
the figure. Notice that the arrow indicates that the
cutting stroke is away from you when the handle is
held in the right hand. If the handle is held in the left
hand, the cutting stroke will be toward you. Lift the
file away from the surface of the work on the return
stroke. When drawfiling no longer improves the
surface texture, wrap a piece of abrasive cloth around
the file and polish the surface, as shown in
The crosshatched method helps you see where you
have scraped the part.
FILING
A file is nearly indispensable when you work with
filing, or using a file card. Let's examine these
operations.
being crossfiled. This means that the file is being
moved across the surface of the work in a crosswise
direction. Keep your feet spread apart to steady
2-18


