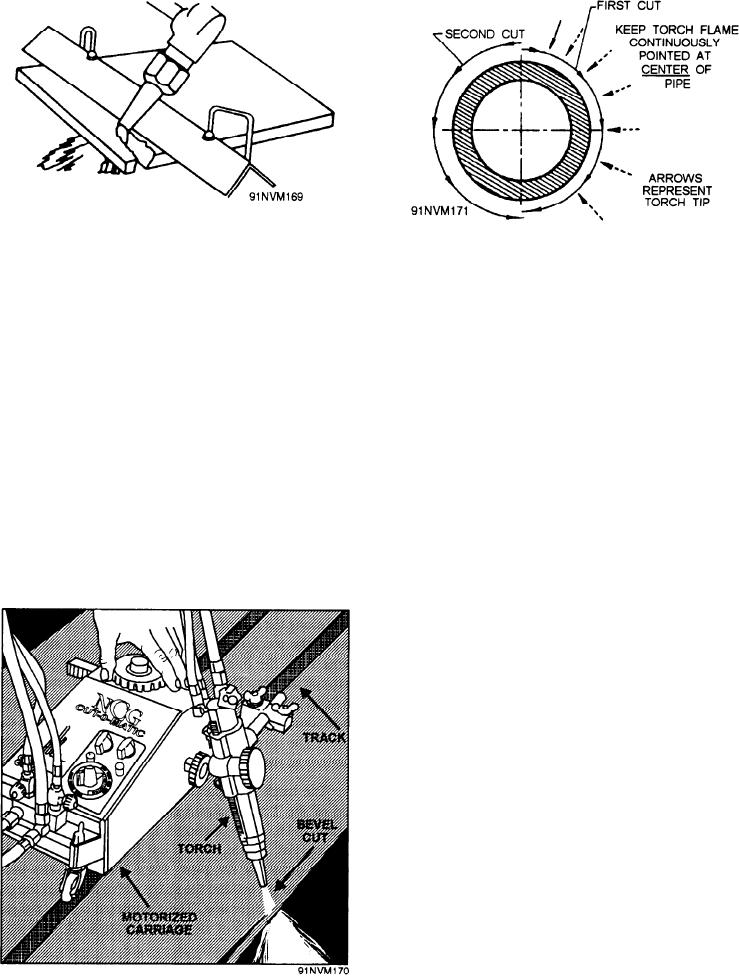
Figure 8-15.--Bevel cutting with an oxyacetylene torch.
Figure 8-17.--Cutting pipe with a cutting torch.
cut so you can tell how it is progressing. Make torch
Beveling Plate
adjustments if necessary. You must move the torch
along at the right speed. If you go too slowly, the
You will frequently have to cut bevels to form
preheating flame will melt the edges along the cut and
joints for welding. To make a bevel cut of 45 in 1-inch
may even weld them back together at the top surface.
steel, the flame must actually cut through 1.4 inches of
If you go too fast, the oxygen will not penetrate
metal. Consider this when selecting the tip size and gas
completely through the metal, and the cut will be
working pressures. You will have to use more pressure
incomplete. If you must restart or recut your work, do
and less speed for a bevel cut than for a straight cut.
so on the waste side of your metal. This serves three
When you are bevel cutting, adjust the tip so that the
purposes. First, it is easier to restart your cut on the
preheating orifices are lined up for efficient pre-
edge of the kerf than in the center. Second, you don't
heating. A piece of 1 -inch angle iron, clamped with the
leave an unsightly gouge or nick in your finished work
angle up, makes an excellent guide for beveling
where you restarted your cut. And finally, you don't
straight edges. Pull the torch along the guide as shown
cut your metal too short by recutting the edge.
in figure 8-15.
If you are aboard a repair ship or a tender, you may
have a radiograph automatic cutting machine similar
to the one in figure 8-16. This is a motor-driven cutting
machine designed to support the cutting torch and
guide it along the line of cut. It can be set to make
uniformly clean cuts or bevels on steel plate.
Straight-line cutting or beveling is done by guiding the
machine along a straight line on steel tracks. Arcs and
circles are cut by guiding the machine with a radius
rod pivoted about a center point.
Cutting and Beveling Pipe
When you are cutting off a piece of pipe, keep the
torch pointed toward the center line of the pipe. Start
the cut at the top and cut down one side. Then begin at
the top again and cut down the other side, finishing at
the bottom of the pipe. The procedure is shown in
figure 8-17.
Sometimes it is necessary to take T and Y fittings
from pipe. Here the cutting torch is a most valuable
Figure 8-16.--Bevel cutting on a circular path with a
radiograph automatic cutting machine.
tool. The usual procedure for fabricating pipe fittings
8-15

