
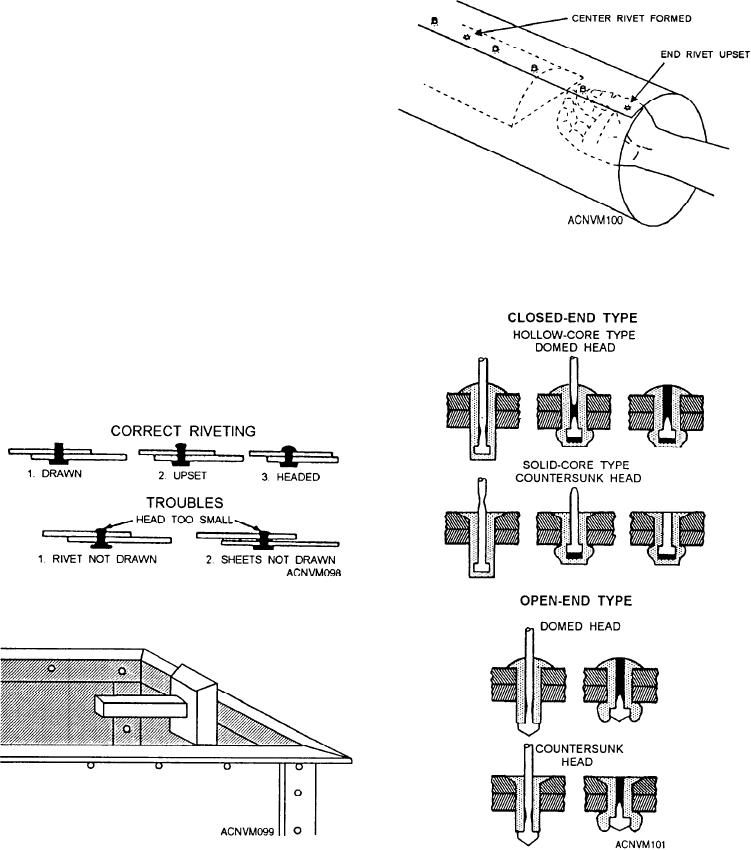
should be enough to form the head on the rivet. A
figure 12-101. These are high-strength, precision-made,
correctly drawn, upset, and headed rivet is shown in the
hollow rivets assembled on a solid mandrel which forms
top part of figure 12-98. The lower part of this
an integral part of the rivet. They are especially useful
illustration shows the results of incorrect riveting
for blind fastening, where there is either limited or no
procedures.
access to the reverse side of the work.
To rivet a seam when you cannot use a stake or a
bench top to back up the rivet, use a hand dolly like the
one in figure 12-99.
To rivet a seam of a cylinder, such as the one shown
in figure 12-100, use a hollow mandrel stake or some
other suitable bar as backing for the rivets. The
procedure for riveting a seam in a cylinder is as follows:
1. Place rivets in the end holes, and slip the piece
over the stake or bar.
2. Draw the seams together and upset the end rivets
enough to hold the structure together.
3. Insert the center rivet. Draw, upset, and head this
rivet.
Figure 12-100.--Riveting a seam in a cylindrical section.
4. Complete the seam by riveting from the center
to one end and then from the center to the other end.
Complete the drawing, upsetting, and heading of each
rivet before you move on to the next rivet.
Besides the sheet metal rivets already discussed,
you will also use the pop rivets like those shown in
Figure 12-98.--Correct and Incorrect riveting.
Figure 12-99.--Hand dolly used to back up rivets.
Figure 12-101.--Pop rivets.
12-41