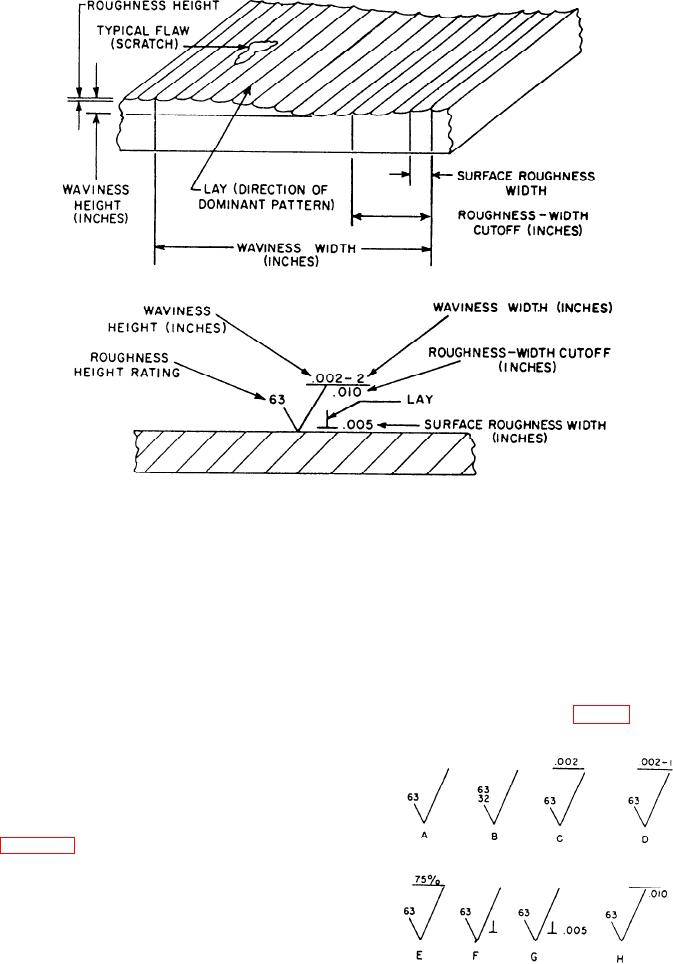
Figure 2-2.--Relation of symbols to surface characteristics.
SURFACE CHARACTERISTICS OF
roughness symbol that you'll find on the drawing is a
METAL
check mark. This symbol is supplemented with a
horizontal extension line above it when requirements
While you must control the finished dimensions
such as waviness width or contact area must be
of a part, you also must consider the degree of
specified in the symbol. A drawing that shows only
smoothness, or surface roughness. Both are very
the basic symbol indicates that the surface finish
important in the efficiency and life of a machine part.
requirements are detailed in the NOTES block. The
A finished surface may appear to be perfectly flat;
roughness height rating is placed at the top of the
but, when you examine it with surface finish measuring
short leg of the check (view A, fig. 2-3). If only one
instruments, you will find it is formed of irregular
waves. On top of these waves are other smaller waves
that we'll call peaks and valleys. You'll measure these
peaks and valleys to determine the surface roughness
measurements of height and width. Measure the larger
waves to give the waviness height and width measure-
ments. Figure 2-2 illustrates the general location of the
various areas for surface finish measurements and the
relation of the symbols to the surface characteristics.
Surface roughness is the measurement of the
finely spaced surface irregularities; their height,
width, direction, and shape establish the predominant
surface pattern. The irregularities are caused by the
cutting or abrading action of the machine tools that
Figure 2-3.--Symbols used to indicate surface roughness,
have been used to obtain the surface. The basic
waviness, and lay.
2-3

