
Figure 7-59.--Picking up the work surface.
6. Lock the knee in position.
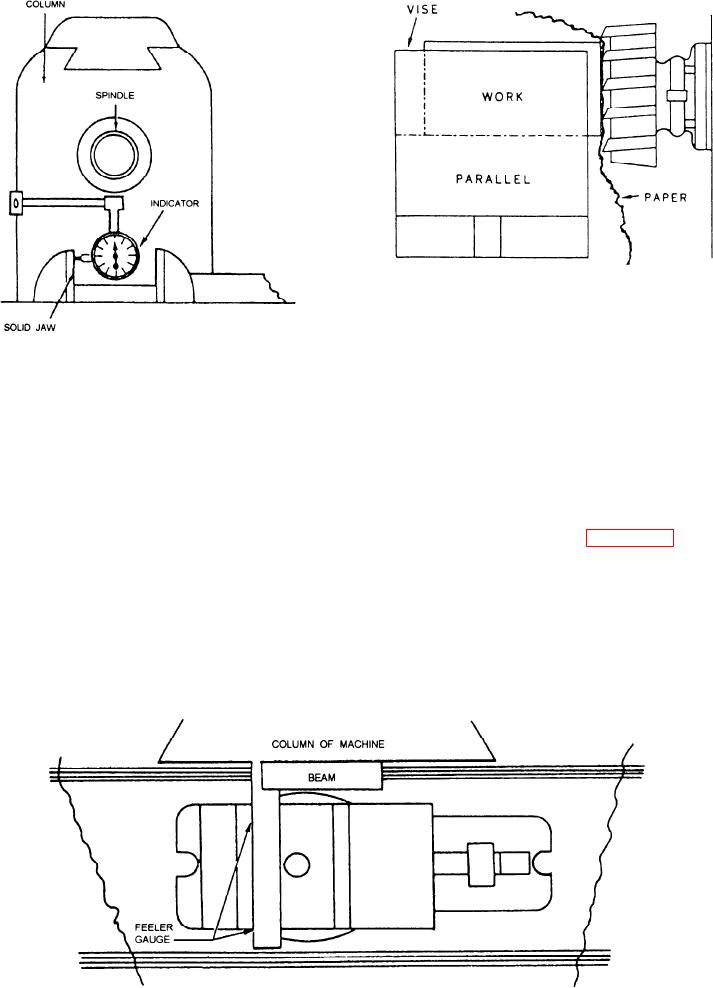
Figure 7-57.--Aligning vise jaws using an indicator.
7. Set the machine for the proper roughing
speed, feed, and table travel.
2. Mount and position a vise on the milling
machine table so the thrust of the cutter is
8. Start the spindle and pick up the end surface
toward the solid vise jaw.
of the work by hand feeding the work toward
the cutter.
3. Align the solid vise jaw square with the
column of the machine, using a dial indicator
9. Place a strip of paper between the cutter and
for accuracy.
the work, as shown in figure 7-59, to help
pick up the surface. When the cutter picks up
4. Mount the work in the vise, allowing the end
the paper there is approximately 0.003-inch
of the work to extend slightly beyond the vise
clearance between the cutter and the material
jaws.
being cut.
5. Raise the knee until the center of the work is
approximately even with the center of the
10. Once the surface is picked up, set the saddle
cutter.
feed graduated dial at ZERO.
Figure 7-58.--Aligning vise jaws using a square.
7-33