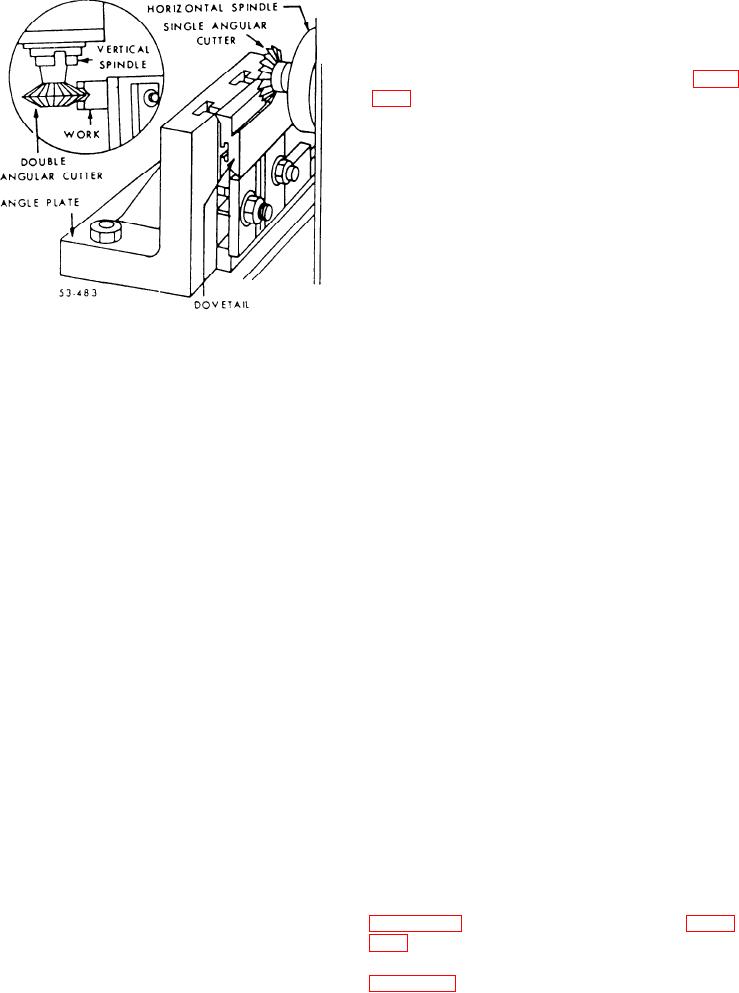
ANGULAR MILLING
Angular milling is the milling of a flat surface that
is at an angle to the axis of the cutter. Normally, you
will use an angular milling cutter, as shown in figure
7-60. However, you can perform angular milling with
a plain, side, or face milling cutter by positioning the
work at the required angle.
Many maintenance or repair tasks require you to
machine flat surfaces on cylindrical work. They
include milling squares and hexagons, and milling
two flats in the same plane.
A square or hexagon is milled on an object to
provide a positive drive, no slip area that can be
grasped by various tools, such as wrenches and
cranks. You will machine squares and hexagons
Figure 7-60.--Angular milling.
frequently on the ends of bolts, taps, reamers, or other
items that are turned by a wrench and on drive shafts
and other items that require a positive drive. The
11. Move the work away from the cutter with the
following information will help you to understand the
table and direct the coolant flow onto the
cutter.
machining of squares and hexagons.
12. Set the roughing depth of cut, using the
graduated dial, and lock the saddle.
Cutter Setup
13. Position the work to about 1/16 inch from the
cutter, and then engage the power feed.
The two types of cutters you will use most often
14. After completing the cut, stop the spindle,
to machine squares or hexagons are side and end
and move the work back to the starting point
milling cutters. You can use side milling cutters to
before the next cut.
machine work that is held in a chuck and for heavy
15. Set the speed and feed for the finishing cut,
cutting. You can use end mills for work that is held in
and then unlock the saddle.
a chuck or between centers and for light cutting. If
16. Move the saddle in for the final depth of cut
you use a side milling cutter, be sure the cutter
and relock it.
diameter is large enough so you can machine the full
length of the square or hexagon without interference
17. Engage the spindle and take the finish cut.
from the arbor. If you use an end mill, be sure it is
18. Stop the machine and return the work to the
slightly larger in diameter than the length of the
starting place.
square or hexagon. The cutter thrust for both types
19. Shut the machine off.
should be up when the work is mounted vertically and
down when it is mounted horizontally in order to use
20. Remove the work from the vise. Handle it
conventional (or up) milling.
very carefully to keep from cutting yourself
before you can deburr the work.
The reason for what appears to be a contradiction
21. Next, mount the work in the vise so the other
in the direction of thrust is the difference in the
end is ready to be machined. Mill this end in
direction of the feed. You can see this by comparing
the same manner as the first, but be sure to
figures 7-61 and 7-62. The cutter shown in figure
measure the length before you take the
7-61 rotates in a counterclockwise direction and the
finishing cut. Before removing the work
work is fed toward the left. The cutter shown in
from the vise, check it for accuracy and
figure 7-62 rotates in a clockwise direction and the
remove the burrs from the newly finished
end.
work is fed upward.
7-34

