skin should never be exposed to the rays of the
welding arc because painful burns may result.
If you are teaching a person how to set up the
equipment, you should demonstrate turning on the
water and gas supply, switching on the transformer,
presetting the gas flow and current range, and then
shutting down the equipment. You should then
have the person repeat the start-up and shut-down
procedures until the procedures are thoroughly
understood.
Establishing an Arc and
Forming a Weld Pool
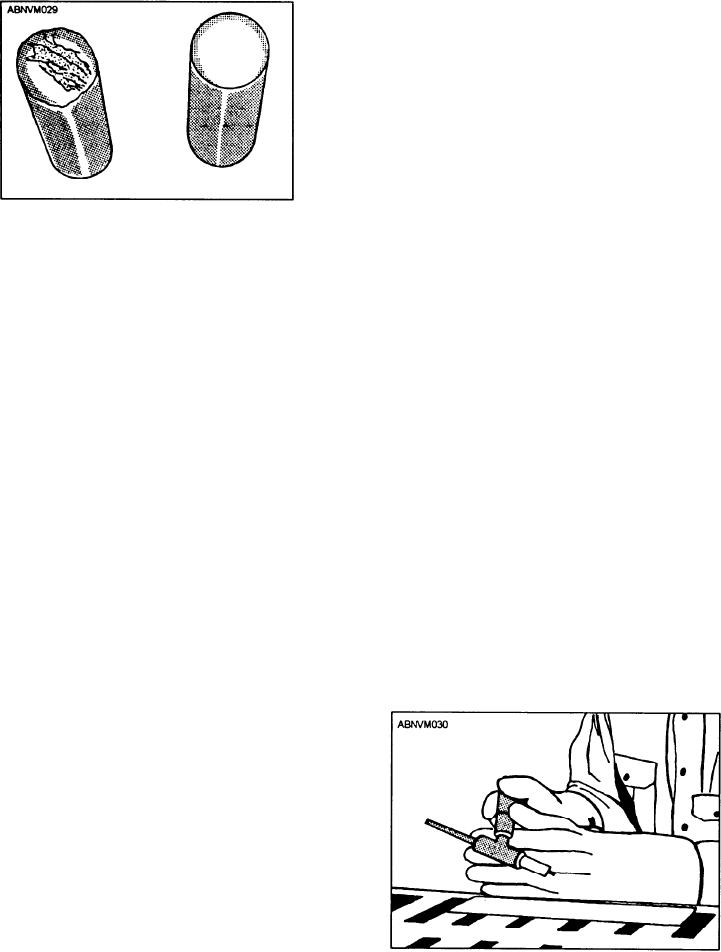
Figure 10-28.--Contaminated and good tungsten electrodes.
This exercise is intended to acquaint you with
the correct technique of initiating an arc and
3. Check the connections on the gas supply for
leaks with soapy water.
forming the weld pool.
4. Select the proper gas cup size according to
As material for this exercise, 1/4" by 6" by 12"
the torch manufacturer's instructions. Make sure
plate of any aluminum alloy recommended for
the gas cup is free of spatter. Clean or replace it if
welding may be used. You will need a standard ac
necessary.
transformer, GTA welding torch equipped with
5/32-inch diameter tungsten electrode, argon gas,
and necessary accessories. The procedure calls for
5. Check the ground cable connections to the
workpiece.
The connections should also be
regulating the argon gas flow 30 to 35 cubic feet per
periodically checked after welding begins, as they
hour. Also, select a welding current of 175 to 225
tend to work loose. This causes the welding current
amperes.
to vary.
When using ac high-frequency current, the
6. Preset the current range (see table 10-7) for
electrode does not need to come in contact with the
t h e joint to be welded, and switch on the
workpiece to strike the arc. The high-frequency
transformer, as shown in view A of figure 10-25.
current will jump the gap between the tungsten
electrode and the workpiece and establish the
7. Open the main shut-off valve on the cylinder
welding current path. To strike the arc, hold the
of gas and adjust the flow, as shown in view B of
torch in a horizontal position, as shown in figure
figure 10-25. Table 10-8 lists the recommended flow
10-29, about 2 inches above the work surface.
for various welding currents.
8. Be sure the water supply to be used is not at
a higher pressure than that recommended by the
torch manufacturer. If satisfactory, the water
shut-off valve is usually opened fully and the flow is
controlled by the water ports in the gun.
9. Never look at a welding arc without a hand
shield or welding helmet with the proper shade of
protective glass, or your eyes will be injured. Eye
fatigue indicates a different shade of glass is
required or there is leakage around the protective
filter glass. A No. 10 glass is satisfactory for most
GTA welding at current ranges of 75 to 200
amperes. Gauntlet gloves and protective clothing
Figure 10-29.--Torch position for the starting swing to strike
must be worn as protection from hot metal. Bare
the arc.
10-31

