paragraphs. When the puddle becomes bright and
fluid, move the arc to the rear of the puddle and
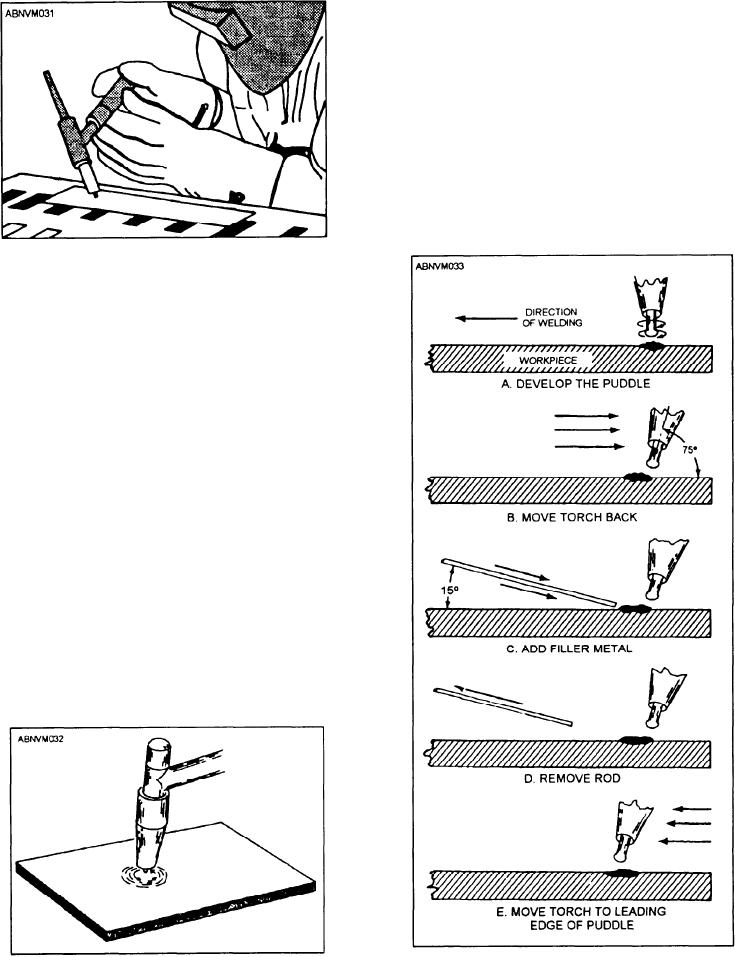
add the filler metal by quickly touching the rod to
the front edge of the puddle. When the puddle
becomes bright and fluid again, repeat these steps.
Figure 10-32 shows the correct procedure for adding
filler metal. This sequence is continued until the
weld joint has been completed. The width and
height of the weld bead is determined by the speed
of travel, movement of the torch, and amount of
filler metal added.
Figure 10-30.--Position of the torch at the end of the swing
when the arc strikes.
Then, with a rapid motion, swing the electrode end
of the torch down to within an eighth of an inch of
the work surface. The arc will then strike. Figure
10-30 shows the torch position at the time the arc
strikes. After the arc has been struck, hold the
torch at a 90-degree angle to the workpiece surface
and with small circular motions, as shown in figure
10-31, form a molten puddle. When the molten
puddle has been formed, hold the torch at a
75-degree angle to the work surface and move the
torch slowly and steadily along the joint at a speed
that will produce a bead of uniform width. Move
the torch slow enough to keep the puddle bright and
fluid. No oscillating or other movement of the
torch is necessary except the steady forward
movement.
When the use of a filler metal is necessary, form
the molten puddle as described in the previous
Figure 10-32.--Addition of filler metal (flat position).
Figure 10-31.--Forming a molten puddle with a GTA torch.
10-32

