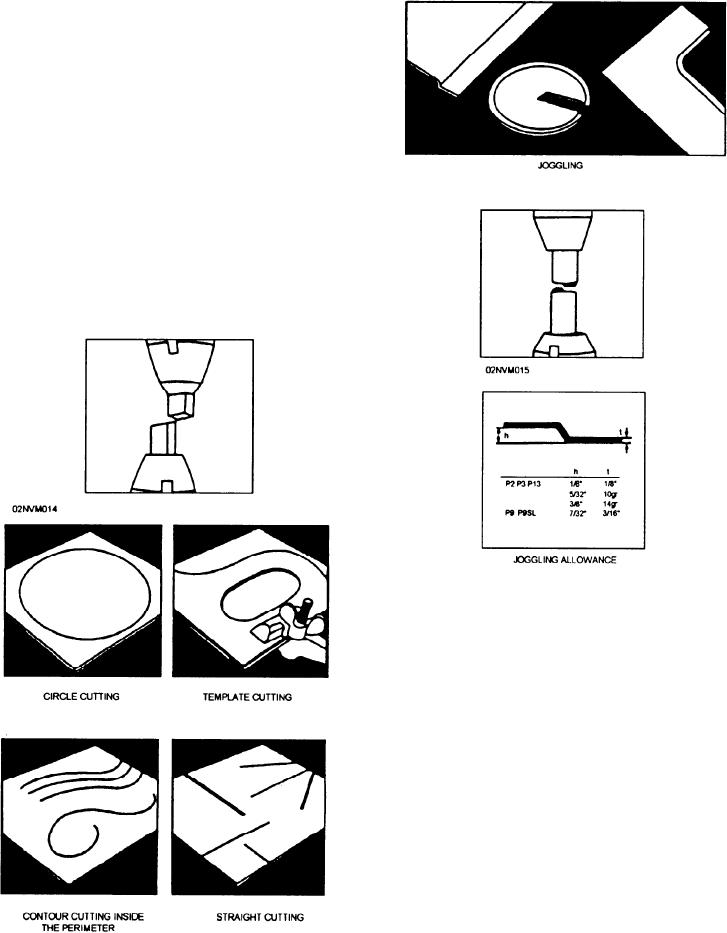
Tooling Setup.--Select the proper tooling for the
task assigned. For cutting straight and circular lines,
use shearing tools, as shown in figure 13-36. Shearing
tools may be used for cutting a freehand pattern or for
contouring the inside or outside perimeter of a project.
Tooling setup steps are as follows:
1. Select the proper tooling and install them in
the proper tool holder. Hand tighten the tightening
nut. Figure 13-36 shows the proper positioning of the
tools.
2. Lower the upper tool into the cutting position by
using the lever on the front of the machine, as shown in
figure 13-36.
Figure 13-35.--Joggling tools.
3. With the tools in the cutting position, check the
clearance between the upper and lower tooling. Use a
piece of white paper as a background to check for side
clearance. Look from one side directly at the white
paper background. You should have a clearance of
0.002 to 0.003 inch. An improper clearance adjustment
will result in a poor quality cut or damage to the
machine.
4. Adjust the tool for side clearance by turning
the side adjustment screw located on the left-hand
side of the toolholder, as shown in figure 13-36.
Turning the adjustment screw clockwise will close
the clearance; while turning it counterclockwise
will open the clearance between the tools.
Figure 13-34.--Shearing tools.
13-29

