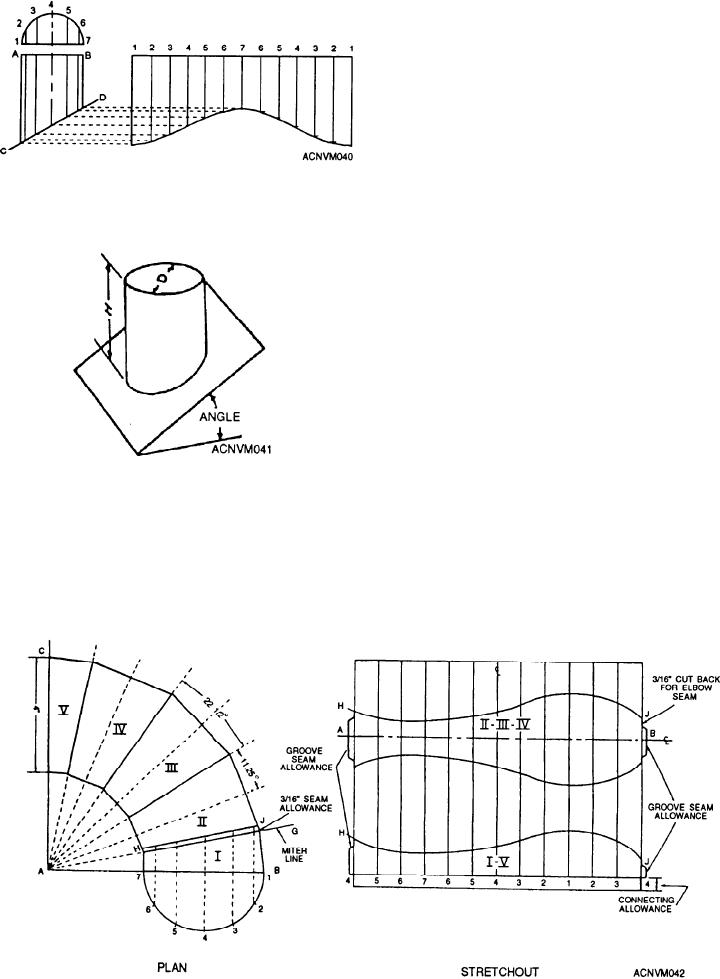
4. Since there is only one line 7 in the stretchout,
you will need to transfer the measurement of line 7 in
the elevation to the stretchout only one time.
5. Finally, connect the points at which the arcs
have intersected each of the elements, with a curve
running from line A to the opposite line 1. Smooth out
your curved line, add the allowances for seams, and the
pattern is completed. If this final line has serious
irregularities, you have made a mistake in your
measurements. Your final stretchout should look
Figure 12-40.--Transfering from elevation to stretchout to
exactly like the one made by projection in figure 12-40.
making the pattern.
To obtain the pattern by projection, you simply
project parallel broken lines from the points of
intersection on the miter to lines with the same number
in the stretchout. These broken lines are drawn at right
angles to the numbered lines and parallel to line AB.
They are drawn from the point where the numbered
lines intersect the miter CD to the point at which they
intersect the most distant line in the stretchout with the
same number. Again, the pattern is completed by
connecting the points of intersection on the stretchout
with a curved line. Remember, the more care you take
in drawing the elevation, stepping off the half-plan, and
transferring the measurements from the elevation to the
Figure 12-41.--Pictorial view of pipe intersected at an angle.
stretchout, the more accurate your pattern will be.
Figure 12-41 is a pictorial view of the plan you have just
laid out.
3. Then, measure line 2 in the elevation, and
transfer this measurement to the two lines marked 2 in
The parallel line method can also be used to develop
the stretchout. Repeat this procedure for lines 3, 4, 5,
an elbow of any desired diameter, depth of throat, or
and 6.
number of pieces. Figure 12-42 shows the development
Figure 12-42.--Development of a five-piece 90-degree elbow.
12-15

