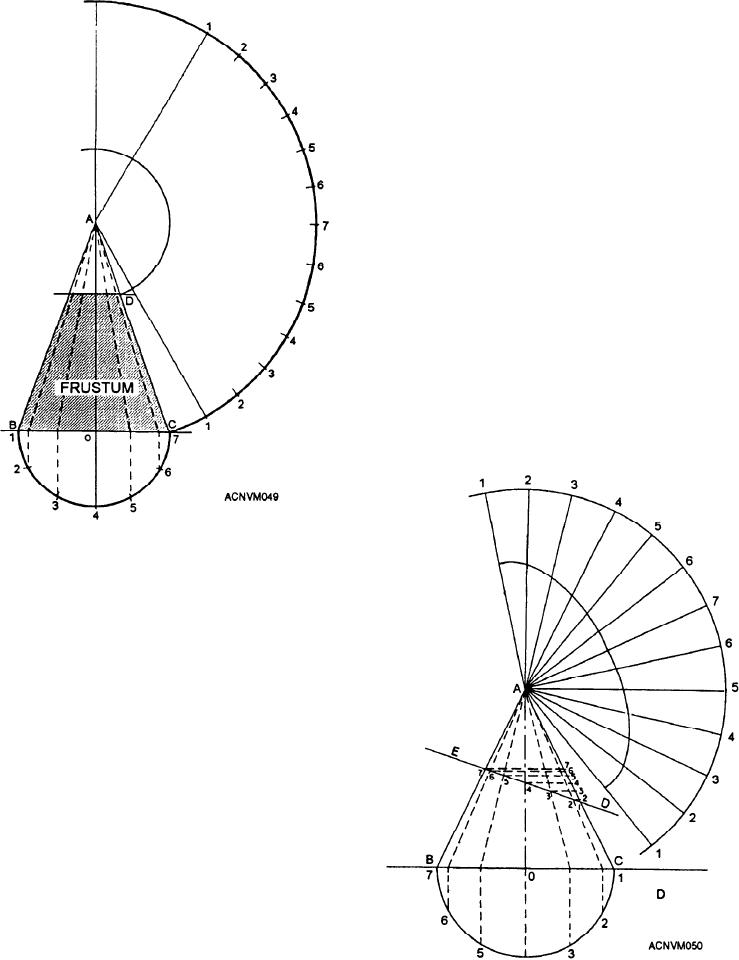
5. Set your dividers equal to the distance of the
step-offs on the half-plan, and step off twice as many
spaces on the stretchout as you have in the half-plan.
6. Number the step-offs from 1 to 7 and back to 1,
and draw connecting lines from vertex A to the number
1 at each end of the stretchout.
7. With vertex A as the center, set your dividers
along line AC the distance of line AD, and scribe an arc
that intersects both lines drawn from A to 1.
The area enclosed between the large and small arcs
and the number 1 lines is the pattern for the frustum of
a cone. Add allowances for seaming and edging and the
stretchout is complete.
To develop a pattern for a cone cut at any angle, you
need merely to elaborate the development of the pattern
for a frustum. Such a pattern is shown in figure 12-50.
To develop a pattern for a cone cut at any angle,
follow the method given here step by step:
1. Draw a cone with line ED cutting the cone at
the required angle, as shown in figure 12-50.
Figure 12-49.--Radial line development of frustum of a cone.
a cone is that part that remains after that point, or top,
has been removed.
To develop a pattern for the frustum of a cone, check
the following steps one-by-one with the illustration
shown in figure 12-49.
1. Draw a front view of a cone, using such
dimensions as your job at hand requires. Letter the
vertex A, the base BC, and the axis AO.
2. At point D, and parallel to line BC, draw a line
that cuts the top from the bottom of the cone. The
bottom portion is called the frustum.
3. Draw a half-plan (using center 0 and radius OB)
beneath the base of the frustum. Step the half-plan off
into an equal number of spaces, and number them as
shown in the illustration.
4. Set your dividers the distance of line AC, and
using the vertex A as a center, scribe an arc of indefinite
Figure 12-50.--Developement of a cone cut at any angle.
length.
12-19

