
TM 55-2815-574-24
0128
REMOVAL - Continued
22.
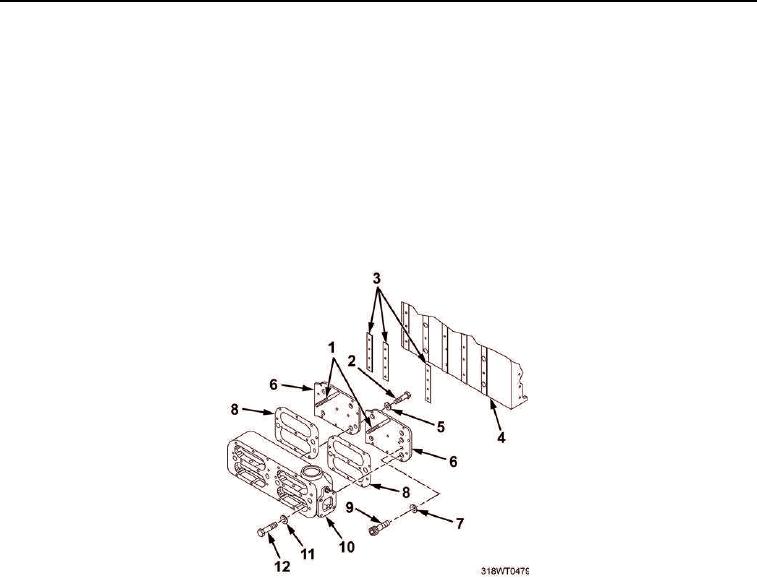
Remove two gaskets (Figure 8, Item 8). Discard gaskets.
23.
Remove two previously installed studs (Figure 8, Item 1).
24.
Remove eight bolts (Figure 8, Item 12) and washers (Figure 8, Item 11) securing two mounting plates
(Figure 8, Item 6) to engine block (Figure 8, Item 4).
25.
Remove key socket head screw (Figure 8, Item 9) and washer (Figure 8, Item 7) from forward oil cooler
mounting plate (Figure 8, Item 6).
26.
Remove two mounting plates (Figure 8, Item 6).
27.
Remove three metal spacers (Figure 8, Item 3) and retain for Installation.
Figure 8. Oil Cooler Mounting Plates Removal.
END OF TASK