
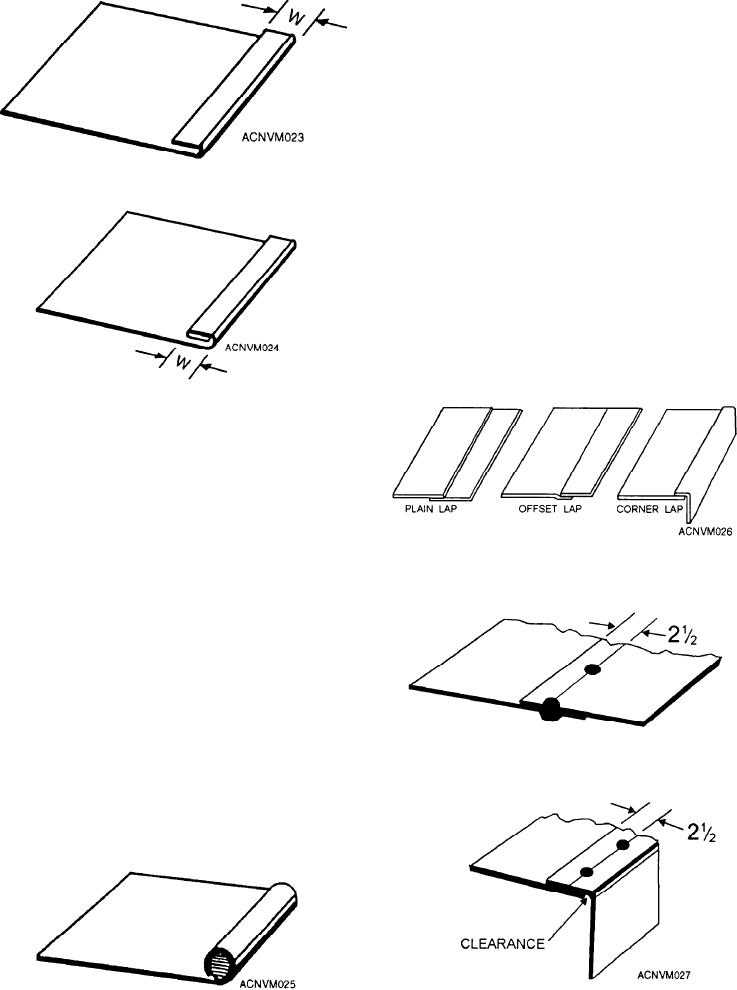
LAP SEAMS are shown in figure 12-26. They may
be of three kinds: the plain lap seam; the offset, or
"joggled," lap seam; or the corner lap seam. Lap seams
by a combination of both riveting and soldering. To
figure the allowance for a lap seam, you must first know
the diameter of the rivet that you plan to use. The center
of the rivet must be set in from the edge a distance of
two and one half times its diameter. The total allowance,
Figure 12-23.--Single-hem edge.
then must be five times the diameter of the rivet that you
are going to use. Figure 12-27 shows the manner in
which a plain lap and a corner lap are laid out for
seaming with rivets. For corner seams, allow an
additional 1/16 inch for clearance.
GROOVED SEAMS are useful in the construction
of cylindrical shapes. There are two types of grooved
seams-the outside grooved seam and the inside
grooved seam (fig. 12-28). The allowance for a grooved
Figure 12-24.--Double-hem edge.
The DOUBLE-HEM EDGE (fig. 12-24) is used
where additional strength is needed or when a smooth
edge is desired inside as well as outside. The allowance
for the double-hem edge is twice the width of the hem.
A WIRED EDGE (fig. 12-25) will often be
specified in plans. Objects such as ice-cube trays,
funnels, garbage pails, and other articles formed from
Figure 12-26.--Lap seams.
sheet metal are manufactured with wired edges to
strengthen and stiffen and to eliminate sharp edges. The
allowance for a wired edge is 2 l/2 times the diameter
of the wire used. For example, if you are using wire that
has a diameter of l/8 inch, multiply l/8 by 2 l/2 and
your answer will be 5/16 inch. This is the amount you
will allow when laying out sheet metal for the wired
edge.
ALLOWING FOR SEAMS
When you made your layout for a drip pan or box,
you were told to allow for a tab for seaming with rivets.
This method of joining sheet metal is known as lap
seaming.
Figure 12-27.--Layout of lap seams for riveting.
Figure 12-25.--Wired edge.
12-9