The correct way to measure an inside diameter is
to hold the micrometer in place with one hand as you
feel for the maximum possible setting of the
micrometer by rocking the extension rod from left to
right and in and out of the hole. Adjust the micrometer
to a slightly larger measurement after each series of
rocking movements until you can no longer rock the
rod from left to right. At that point, you should feel a
very slight drag on the in and out movement. There
are no specific guidelines on the number of positions
within a hole that should be measured. If you are
checking for taper, take measurements as far apart as
possible within the hole. If you are checking for
roundness or concentricity of a hole, take several
measurements at different angular positions in the
same area of the hole. You may take the reading
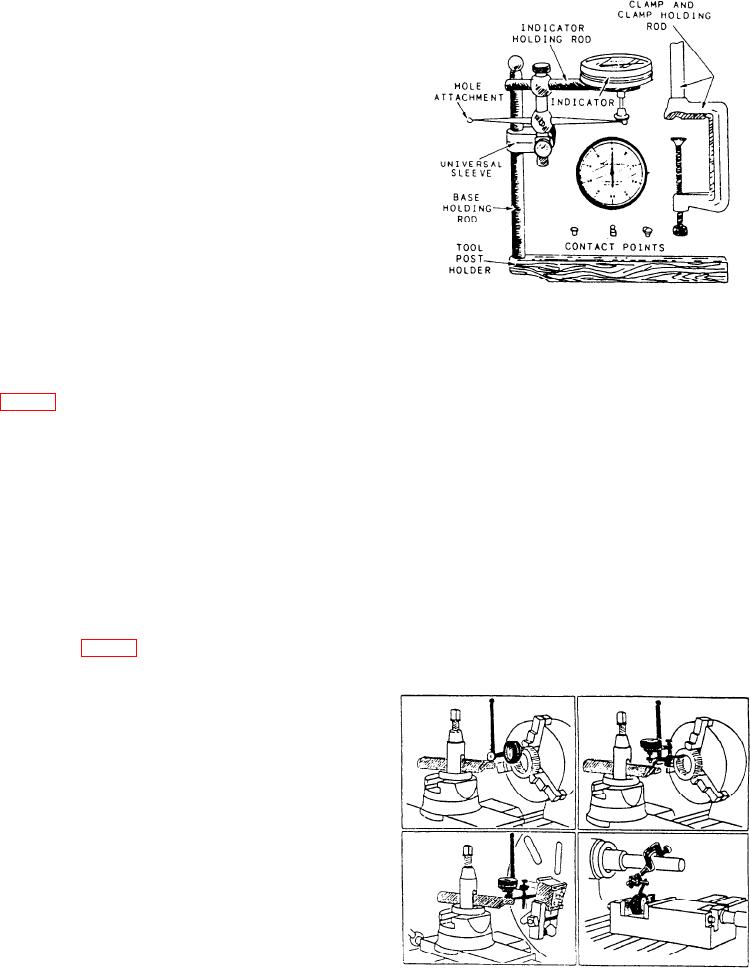
Figure 1-6.--Universal dial indicator.
directly from the inside micrometer head, or you may
use an outside micrometer to measure the inside
BLADE MICROMETER.--A blade micrometer
micrometer.
(not shown) has an anvil and a spindle that are thin
DEPTH MICROMETER.--A depth micrometer
and flat. The spindle does not rotate. This micrometer
(fig. 1-4) is used to measure the depth of holes, slots,
is especially useful in measuring the depth of narrow
counterbores, and recesses, and the distance from a
grooves, such as an O-ring seat on an outside
surface to some recessed part. This type of
diameter.
micrometer is read exactly opposite from the method
used to read an outside micrometer. The zero is
GROOVE MICROMETER.--A groove microm-
located toward the closed end of the thimble. The
eter (not shown) looks like an inside micrometer with
measurement is read in reverse and increases in
two flat disks. The distance between the disks
amount (depth) as the thimble moves toward the base
increases as you turn the micrometer. It is used to
of the instrument. The extension rods come either
measure the width of grooves or recesses on either the
round or flat (blade-like) to permit measuring a
outside or the inside diameter. The width of an
narrow, deep recess or grooves.
internal O-ring groove is an excellent example of a
THREAD MICROMETER.--The
thread
groove micrometer measurement.
micrometer (fig. 1-4) is used to measure the depth of
threads that have an included angle of 60. The
measurement obtained represents the pitch diameter
of the thread. They are available in sizes that measure
pitch diameters up to 2 inches. Each micrometer has
a given range of number of threads per inch that can
be measured correctly. You'll find additional
information on this micrometer in chapter 6.
BALL MICROMETER.--This type of microm-
eter (not shown) has a rounded anvil and a flat
spindle. It`s used to check the wall thickness of
cylinders, sleeves, rings, and other parts that have a
hole bored in a piece of material. The rounded anvil
is placed inside the hole and the spindle is brought
into contact with the outside diameter. Ball
attachments that fit over the anvil of regular outside
micrometers are also available. When using the
attachments, you must compensate for the diameter of
Figure 1-7.--Applications of a dial indicator.
the ball as you read the micrometer.
1-8

