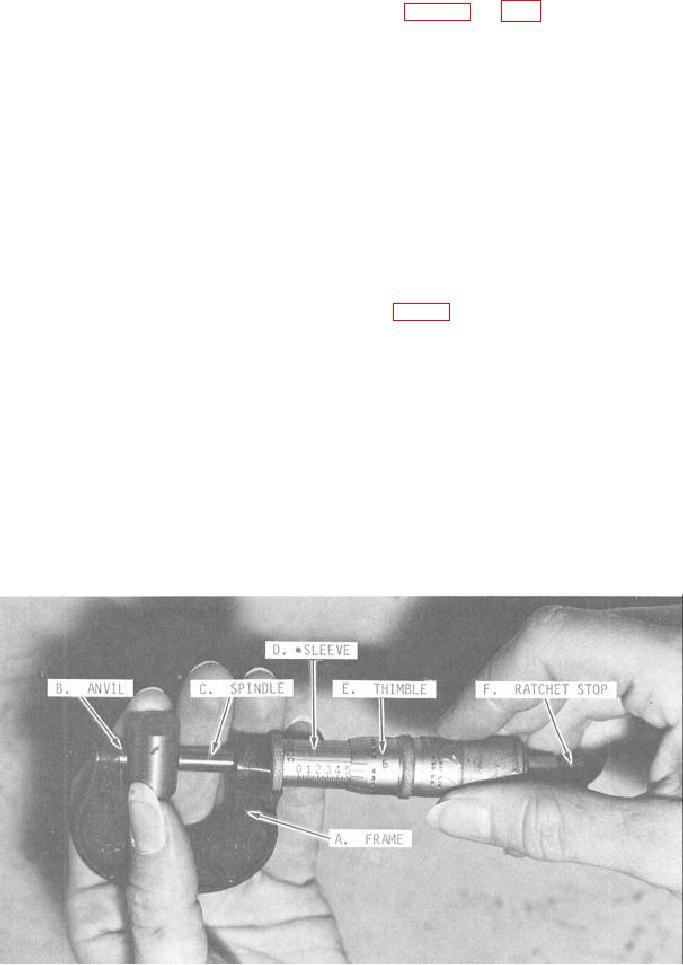
OUTSIDE MICROMETER.--Outside microm-
ADJUSTABLE GAUGES
eters (figs. 1-4 and 1-5), are used to measure the
thickness or the outside diameter of parts. They are
You can adjust adjustable gauges by moving the
available in sizes ranging from 1 inch to about 96
scale or by moving the gauging surface to the
inches in steps of 1 inch. The larger sizes normally
dimensions of the object being measured or gauged.
come as a set with interchangeable anvils that provide
For example, on a dial indicator, you can adjust the
a range of several inches. The anvils have an
face to align the indicating hand with the zero point on
adjusting nut and a locking nut to allow you to set the
the dial. On verniers, however, you move the
micrometer with a micrometer standard. Regardless
measuring surface to the dimensions of the object
of the degree of accuracy designed into the
being measured.
micrometer, the skill applied by each individual is the
primary factor in determining accuracy and reliability
Micrometers
in measurements. Training and practice will make you
proficient in using this tool.
Micrometers are probably the most used precision
INSIDE MICROMETER.--An inside microm-
measuring instruments in a machine shop. There are
eter (fig. 1-4) is used to measure inside diameters or
many different types, each designed to measure
between parallel surfaces. They are available in sizes
surfaces for various applications and configurations
ranging from 0.200 inch to over 100 inches. The
of workpieces. The degree of accuracy also varies,
individual interchangeable extension rods that may be
with the most common graduations ranging from
assembled to the micrometer head vary in size by 1
o n e - t h o u s a n d t h (0.001) of an inch to one
inch. A small sleeve or bushing, which is 0.500 inch
ten-thousandth (0.0001) of an inch. You'll find
long, is used with these rods in most inside
information on the procedure used to interpret the
micrometer sets to provide the complete range of
readings on micrometers in USE and CARE of HAND
sizes. It's slightly more difficult to use the inside
TOOLS and MEASURING TOOLS, NAVEDTRA
micrometer than the outside micrometer-there is
12085. We have provided brief descriptions of the
more chance that you won't get the same "feel" or
more common types of micrometers in the following
measurement each time you check the same surface.
paragraphs.
28.321
Figure 1-5.--Nomenclature of an outside micrometer caliper.
1-7

