TM 55-2815-574-24
0052
CLEANING - Continued
WARNING
Do not exceed 40 PSI (280 kPa) when using compressed air for drying components.
Failure to comply may result in serious injury to personnel.
8.
Dry cylinder head (Figure 2, Item 2) with compressed air.
END OF TASK
INSPECTION
1.
Inspect cover plates (Figure 1, Item 4) for cracks and warping. Replaced damaged parts.
2.
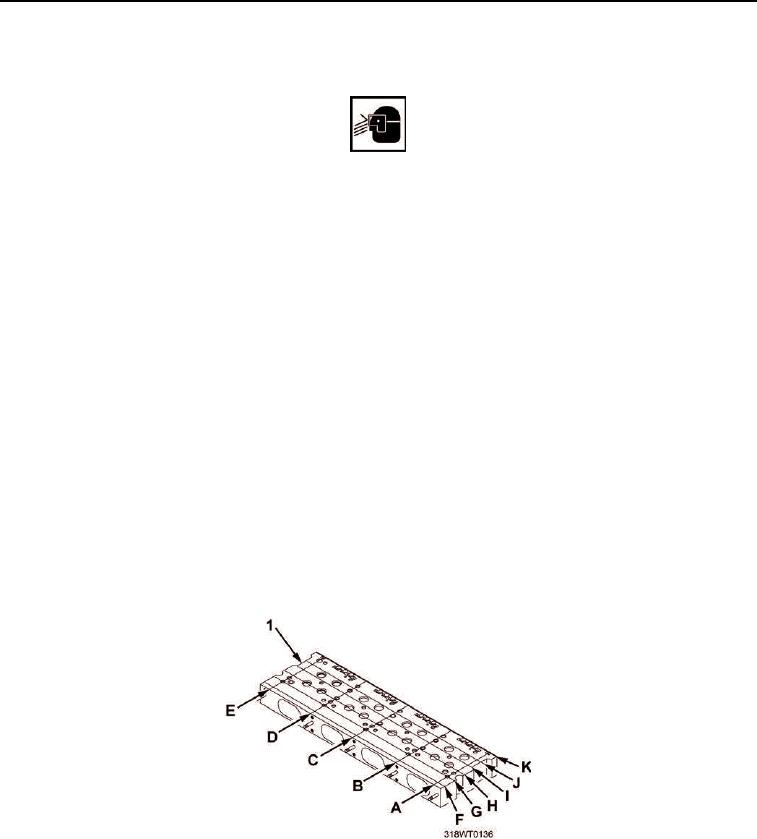
Inspect cylinder head (Figure 3, Item 1) for cracks using magnetic particle method or equivalent. Discard
cylinder head if cracks are found.
3.
Inspect bottom of cylinder head (Figure 3, Item 1) for flatness as follows:
a.
Check for warpage across cylinder head (Figure 3, Item 1) at lines A, B, C, D, and E using heavy
straight edge and feeler gage, verifying warpage does not exceed 0.0040 in. (0.01 cm). Discard
cylinder head if limits are exceeded.
b.
Check for longitudinal warpage on cylinder head (Figure 3, Item 1) at lines 1, 2, 3, 4, 5, and 6 using
heavy straight edge and feeler gage, verifying warpage does not exceed 0.0080 in. (0.02 cm). Discard
cylinder head if limits are exceeded.
4.
Inspect bottom of cylinder head (Figure 3, Item 1) for pitting. Discard pitted cylinder head.
Figure 3. Cylinder Head Inspection.

